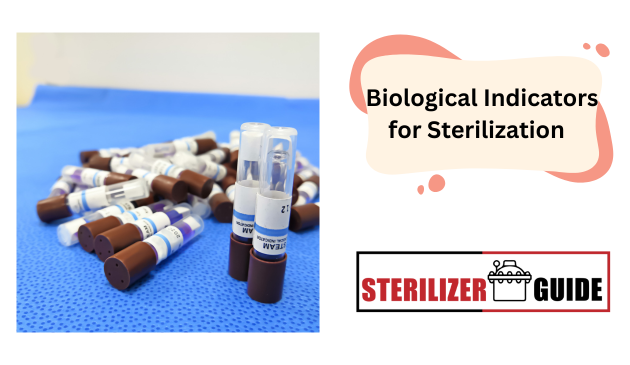
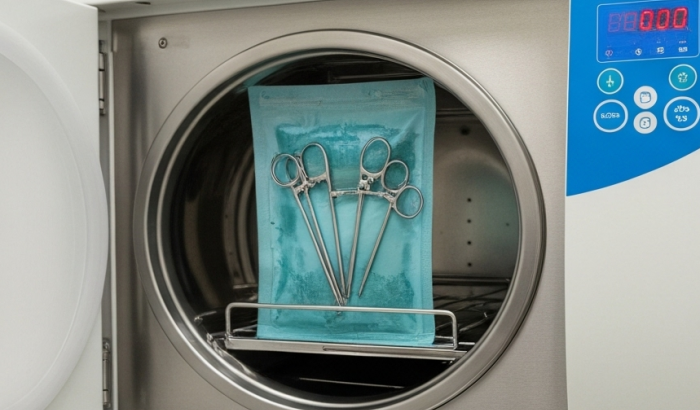
Sterilization keeps patients, staff, and products safe. But how can you be sure the process really worked? That’s where biological indicators come in.
These small test systems use highly resistant microorganisms to confirm whether sterilization was effective. They offer a higher level of assurance than chemical indicators alone.
For instance, a study in dental offices across Saskatchewan examined nearly 200,000 BI tests between 2015 and 2022. It found an overall failure rate of 0.2%, which dropped from 0.51% in 2015 to 0.15% in 2022, showing clear improvement over time BioMed Central.
Let’s explore what biological indicators are, the different types available, how they work, and why they matter so much in healthcare, labs, and manufacturing.
What Are Biological Indicators for Sterilization?
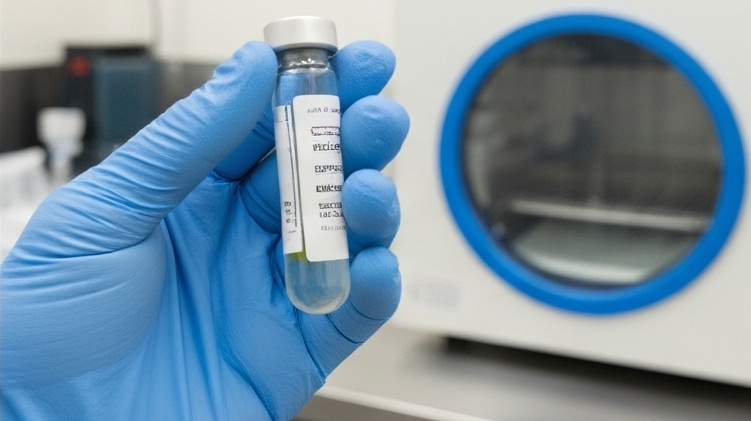
Biological indicators (BIs) are tools used to test whether a sterilization process is effective. They contain highly resistant microorganisms, usually bacterial spores, that can survive extreme conditions.
When a sterilizer runs, the BI is exposed to the same conditions as the instruments. After the cycle, the BI is incubated to see if any spores survive. If no growth occurs, the sterilization process was successful.
BIs are considered the most reliable method for monitoring sterilization. They are widely used in hospitals, dental clinics, laboratories, and manufacturing industries to ensure safety and compliance.
Key points:
- Contain resistant bacterial spores.
- Test effectiveness of sterilization methods.
- Provide a biological proof that sterilization worked.
- Used in healthcare, labs, and industrial settings.
Why Biological Indicators Are Important

Sterilization is critical for safety, but how can you be sure it actually worked? Biological indicators (BIs) provide clear answers. They are the most reliable way to confirm that harmful microorganisms have been destroyed.
Using BIs helps:
- Ensure patient safety: Instruments are free from bacteria and spores that can cause infections.
- Meet regulatory standards: Healthcare and lab facilities must comply with FDA, CDC, and ISO requirements.
- Detect sterilization failures: Early detection prevents contaminated instruments from being used.
- Maintain trust: Hospitals, labs, and manufacturers can confidently show their sterilization processes are effective.
In a dental clinic study, nearly 200,000 BI tests were analyzed from 2015 to 2022. The overall failure rate was just 0.2 %, dropping from 0.51 % in 2015 to 0.15 % in 2022. This shows how effective BI monitoring can be in reducing sterilization failures.
Types of Biological Indicators
Biological indicators come in different forms, each designed for specific sterilization methods. Choosing the right type ensures accurate monitoring and reliable results.
| Type of Biological Indicator | Description | Advantages | Use Case (Sterilization Method) | Typical Incubation Time |
|---|---|---|---|---|
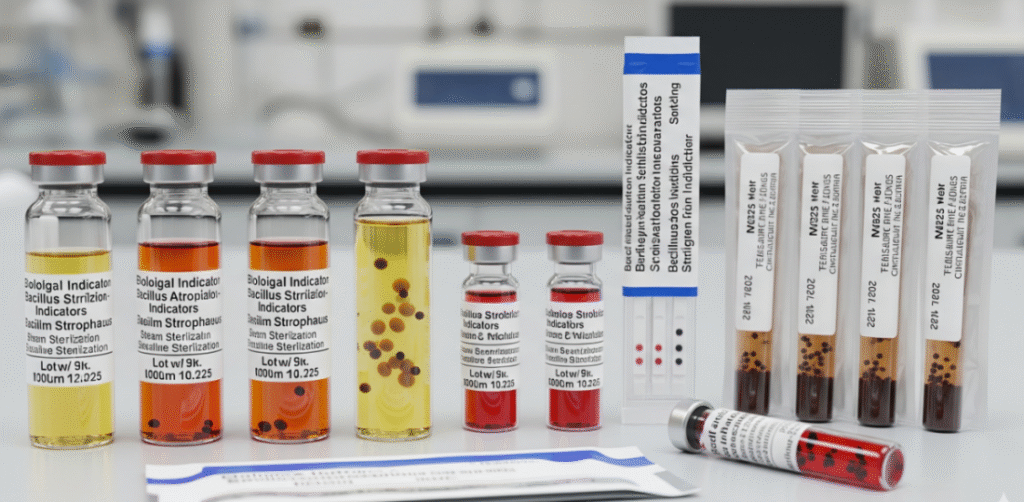
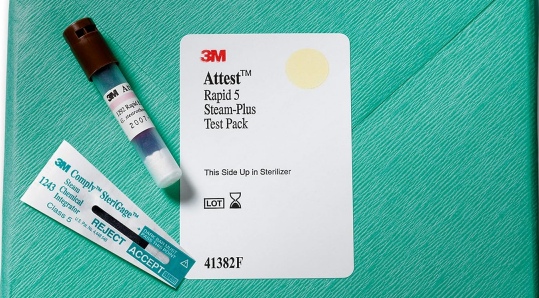
| Spore Strips | Paper strips inoculated with bacterial spores, sealed in a glassine envelope. | Low cost, simple to use, widely available. | Steam (autoclave), dry heat, ethylene oxide. | 24–48 hours (up to 7 days for some methods) |
| Self-Contained Vials (Ampoules) | Spores + growth medium contained in a small vial. After sterilization, vial is crushed to activate medium. | Reduced contamination risk, easy handling, convenient. | Steam sterilizers, hydrogen peroxide plasma. | 24–48 hours (rapid readout: 1–3 hours) |
| Suspension Systems | Spore suspension in liquid form, applied to surfaces or carriers. | Customizable, useful for non-standard equipment. | Complex sterilization validation, unusual loads. | 24–48 hours |
| Rapid-Readout Biological Indicators | Contain spores + fluorescent/enzymatic markers for faster detection. | Quick results (1–3 hours), reliable. | Hospitals, surgery centers where fast turnaround is needed. | 1–3 hours |
How Biological Indicators Work in Sterilization
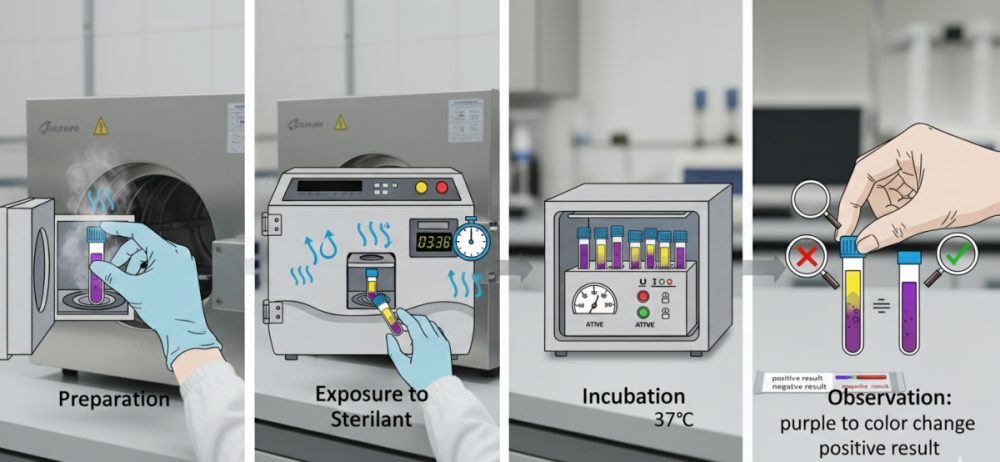
Biological indicators are designed to test whether sterilization processes are truly effective. They contain highly resistant spores that are harder to kill than most microorganisms.
How it works:
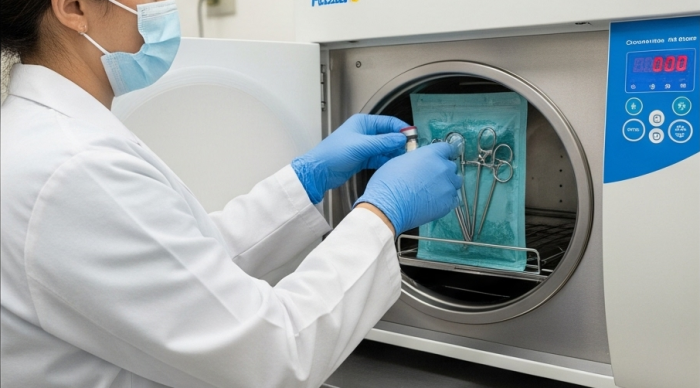
- Placement: The BI is placed inside the sterilizer along with instruments or equipment.
- Sterilization cycle: The sterilizer runs its normal cycle-steam, ethylene oxide, dry heat, or hydrogen peroxide plasma.
- Incubation: After sterilization, the BI is incubated under controlled conditions.
- Observation: If the spores grow, the sterilization failed. No growth means the process was successful.
Biological indicators provide direct evidence that sterilization has destroyed harmful microorganisms. Biological indicators are more reliable than chemical indicators. Chemical indicators only show temperature or sterilant exposure, not whether microbes were actually killed.
Key takeaway:
- BIs confirm sterilization effectiveness.
- They detect failures that other monitoring methods might miss.
- They are essential for patient safety, regulatory compliance, and quality assurance.
In one large-scale study across U.S. hospitals, 77% of sterilization failures were only detected by biological indicators, not by chemical or mechanical monitoring. This proves BIs are critical for catching hidden risks in the sterilization process (CDC, 2008 Guideline for Disinfection and Sterilization in Healthcare Facilities).
Biological Indicators vs. Chemical Indicators
Both biological and chemical indicators are used to monitor sterilization. But they work in different ways and provide different types of information.
Biological Indicators (BIs):
- Contain live spores that test if sterilization actually killed microorganisms.
- Provide direct evidence of sterilization effectiveness.
- Require incubation to confirm results (time varies by type).
Chemical Indicators (CIs):
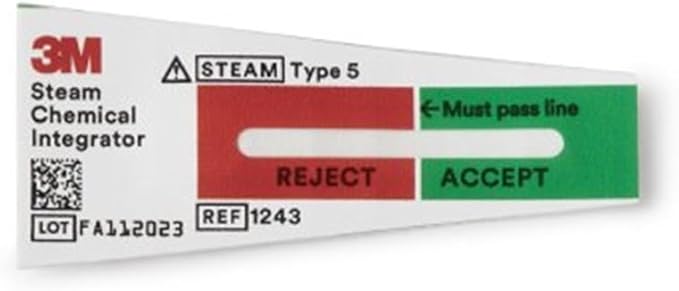
- Change color or form when exposed to certain sterilization conditions, such as heat, steam, or chemicals.
- Show that sterilization conditions were met, but do not confirm microbial death.
- Provide instant visual feedback.
Why both are used:
- Chemical indicators help quickly identify if a cycle ran correctly.
- Biological indicators confirm that sterilization truly killed resistant microbes.
- Using both ensures maximum safety and compliance in healthcare and laboratory settings.
Key takeaway:
Biological indicators prove effectiveness, while chemical indicators verify exposure. Together, they provide a complete sterilization monitoring solution.
Biological Indicators in Different Sterilization Methods
Biological indicators are critical tools used to verify that sterilization processes effectively destroy harmful microorganisms. Sterilization methods vary in temperature, pressure, and chemical exposure, so the correct BI must be chosen for each method. Using biological indicators ensures that instruments, equipment, and medical devices are safe for use and meet regulatory standards.
Autoclave (Steam Sterilization)
Steam sterilization uses high-pressure steam to eliminate microorganisms from instruments and equipment. It is one of the most common methods in hospitals and labs.
- Common BI: Geobacillus stearothermophilus spores
- Placement: Inside the load; incubate after the cycle to confirm sterilization
- Best for: Heat-stable instruments, surgical tools, lab glassware
Ethylene Oxide (EtO) Sterilization
Ethylene oxide sterilization is ideal for heat- and moisture-sensitive instruments. The gas penetrates equipment and effectively kills microorganisms.
- Common BI: Bacillus atrophaeus spores
- Purpose: Confirms gas penetration and microbial kill
- Best for: Delicate instruments, electronics, plastics
Hydrogen Peroxide Gas Plasma Sterilization
Hydrogen peroxide gas plasma is a low-temperature method suitable for delicate or moisture-sensitive equipment. It uses vaporized hydrogen peroxide and plasma to sterilize surfaces.
- Common BI: Geobacillus stearothermophilus spores
- Indicator types: Self-contained vials or rapid-readout systems
- Best for: Sensitive medical devices, endoscopes, lab equipment
Dry Heat Sterilization
Dry heat sterilization uses hot air ovens to sterilize instruments that cannot contact moisture. It works by oxidizing cellular components of microorganisms.
- Common BI: Bacillus atrophaeus spores
- Ensures proper heat penetration and effective sterilization
- Best for: Metal instruments, powders, oils
Key takeaway:
Biological indicators provide reliable verification for all sterilization methods. Selecting the right BI and following proper procedures ensures instruments are safe and compliant with standards.
Step-by-Step Procedure for Biological Indicator Testing
Testing biological indicators is a careful process that ensures sterilization cycles are effective. Each step plays a vital role in verifying that harmful microorganisms have been destroyed. Following a structured procedure helps healthcare, lab, and manufacturing facilities maintain safety, reliability, and compliance.
Prepare the Indicator
Before testing, it is important to select and handle the correct biological indicator properly. Proper preparation ensures accurate results and avoids false readings.
- Choose the correct BI for the sterilization method.
- Check expiration date and storage conditions.
- Handle with clean hands or gloves to prevent contamination.
Placement in Sterilizer
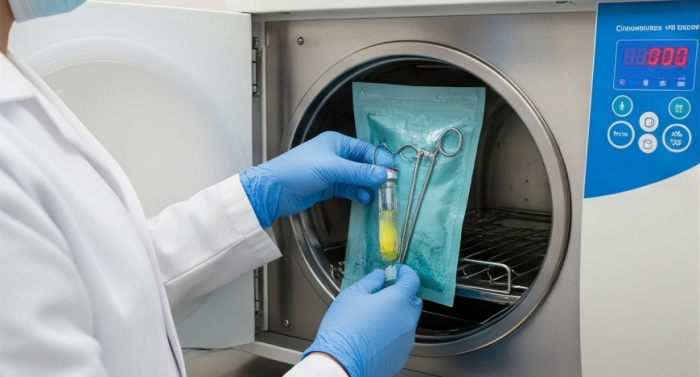
Where you place the indicator affects its ability to accurately measure sterilization. Positioning it in the right spot ensures the most reliable results.
- Place the BI inside the load, in a location hardest for the sterilant to reach.
- Avoid walls, vents, or direct exposure to steam/chemicals.
- Ensure the BI is secure and won’t move during the cycle.
Run Sterilization Cycle
The sterilization process must follow standard operating procedures to guarantee effectiveness. Proper cycle parameters are essential for accurate BI testing.
- Operate the sterilizer according to protocol.
- Confirm time, temperature, pressure, or chemical exposure matches required settings.
- Avoid opening the sterilizer during the cycle.
Incubation
After sterilization, incubation allows any surviving spores to grow so you can detect failures. Following proper incubation methods ensures reliable results.
- Incubate the BI in a controlled environment as per manufacturer instructions.
- Maintain proper temperature and duration for the indicator type.
- Monitor for microbial growth throughout the incubation period.
Observation and Interpretation
Checking the BI results carefully shows whether sterilization was successful. Accurate interpretation helps prevent unsafe equipment use.
- No growth indicates sterilization success.
- Any growth signals sterilization failure; review the cycle and sterilizer.
- Compare results to control indicators if available.
Documentation

Recording BI results is crucial for quality assurance and regulatory compliance. Proper documentation helps maintain safety and accountability.
- Log all test results with date, sterilizer ID, and cycle details.
- Keep records for inspections and audits.
- Note any failures and corrective actions taken.
Common Biological Indicator Organisms
Biological indicators rely on highly resistant microorganisms to test sterilization effectiveness. Different sterilization methods require specific organisms because their spores have varying resistance to heat, gas, or chemicals. Selecting the right organism ensures accurate monitoring and reliable results.
Geobacillus stearothermophilus
- Commonly used for steam sterilization (autoclaves) and hydrogen peroxide gas plasma.
- Extremely heat-resistant spores.
- Ideal for testing high-temperature sterilizers.
Bacillus atrophaeus
- Used for dry heat and ethylene oxide sterilization.
- Resistant to chemical sterilants and moderate heat.
- Suitable for moisture-sensitive and delicate instruments.
Bacillus subtilis (less common)
- Sometimes used for dry heat sterilization validation.
- Provides an alternative spore type for specific industrial applications.
Key takeaway: Choosing the correct biological indicator organism for the sterilization method is essential for accurate results, safety, and compliance.
FDA & ISO Standards for Biological Indicators
Biological indicators must meet strict regulatory standards to ensure they reliably confirm sterilization effectiveness. Hospitals, laboratories, and manufacturers follow these guidelines to maintain safety, quality, and compliance. Understanding the key standards helps facilities select and use BIs correctly.
FDA (Food and Drug Administration):
- Regulates the manufacture, labeling, and use of biological indicators in the U.S.
- Ensures BIs meet safety and performance requirements before they are marketed.
- Provides guidance documents for manufacturers and healthcare facilities (FDA Guidance on Sterilization Process Controls).
ISO 11138:
- Defines global requirements for biological indicators used in sterilization processes.
- Covers spore production, population, resistance characteristics, and performance testing.
- Applies to steam, ethylene oxide, dry heat, and hydrogen peroxide sterilization (ISO 11138 Overview – ISO.org).
CDC (Centers for Disease Control and Prevention) Guidance:
- Recommends routine BI monitoring for sterilizers used on critical instruments in healthcare.
- Provides guidance on placement, frequency of use, and interpreting results.
- Highlights that BIs are the most reliable method for verifying sterilization effectiveness (CDC Sterilization Guidelines).
Key takeaway: Adhering to FDA and ISO standards makes biological indicators reliable and accurate. They ensure sterilization results can be trusted. Following these standards helps healthcare and lab facilities keep instruments safe and meet regulations.
Advantages & Limitations of Biological Indicators
Biological indicators play a crucial role in verifying sterilization because they directly measure the destruction of resistant microorganisms. This makes them highly reliable for ensuring patient and equipment safety. However, while they are considered the gold standard, they also come with certain drawbacks that need to be balanced with practical considerations.
Advantages
- High accuracy: Provide direct proof that microorganisms were destroyed.
- Reliable confirmation: Considered the gold standard for sterilization validation.
- Applicable across methods: Work with steam, EtO, hydrogen peroxide, and dry heat.
- Regulatory compliance: Required by FDA, ISO, and CDC guidelines in many cases.
Limitations
- Incubation time: Results can take hours to days, depending on BI type.
- Delayed feedback: Equipment may already be in use before BI confirms sterilization.
- Cost factor: More expensive than chemical indicators or physical monitoring.
- Handling needs: Require proper storage, placement, and incubation for accurate results.
Key insight: Biological indicators deliver unmatched reliability, but facilities often use them alongside chemical indicators and process monitoring for faster day-to-day validation.
Best Practices for Using Biological Indicators
To ensure accurate sterilization monitoring, biological indicators must be handled and used correctly. Following best practices helps reduce errors, improves reliability, and ensures compliance with healthcare and lab standards.
- Correct placement: Position the BI in the most challenging area for sterilant to reach (e.g., center of the load or inside instruments).
- Use with every cycle (when critical): Especially for implants and high-risk instruments.
- Follow manufacturer guidelines: Always use recommended incubation time and conditions.
- Combine with other indicators: Use alongside chemical and physical indicators for complete assurance.
- Record results: Maintain detailed sterilization logs for traceability and audits.
- Staff training: Ensure all personnel understand correct BI handling and interpretation.
Final Words
Biological indicators are the most trusted way to check sterilization. They prove that even the toughest microorganisms are destroyed. This makes them more reliable than chemical or physical indicators, which only confirm that certain conditions were reached.
Each sterilization method needs its own type of biological indicator. For example, steam uses Geobacillus stearothermophilus, while dry heat and ethylene oxide often use Bacillus atrophaeus. Choosing the right BI ensures accurate results and safer instruments.
Although incubation can take time and adds cost, the benefits are worth it. Using BIs regularly helps meet safety standards, protects patients, and builds confidence in sterilization practices. They remain an essential part of infection control in healthcare and beyond.