
Nail clippers are one of the household items which can harbor harmful bacteria and germs. Therefore, learning how to sterilize nail clippers is very crucial because dirt tends to accumulate on it hence it can easily be transferred. This requires you to sterilize regularly to ensure you are not susceptible to underlying infections. Well, sterilization is the best way to clean nail clippers because it ensures all germs are killed. So let’s get into it.
Nail clippers are typically used on the nails of the toes, fingers, and toenails. Nail clippers help to trim the nails of your finger, toes, and toenails, or in some cases the whole hand. They are also used to shape, clip, and cut nails. If you are unsure of how to sterilize your nail clippers before and after use, this blog will help you out.
How To Sterilize Nail Clippers Step-By-Step Guide
Nail clippers are a must-have for any home manicurist, or for anyone who has to cut their nails. As you know, the fact that many nail clippers are not properly sterilized can lead to harmful bacteria proliferation. This blog offers tips and tricks on how to sterilize your nail clippers. Below, you’ll find the easy steps on how to sterilize your nail clippers.
Products Mentioned in The Video
1. Manicure brush, Scrub brush (click here to view)
2. Disinfecting Tray (click here to view)
3. EPA Registered – Hospital grade disinfectant solution (click here to view)
4. Sterilizer Cabinet (click here to view)
5. Sterilization pouches (click here to view)
Step 1: Use Disinfectants
You should purchase a hospital-grade disinfectant because they are very effective. Disinfectants are normally sold when they are concentrated so you will have to dilute it with distilled water. This is because some impurities from tap water might compromise with the overall performance of the disinfectant. When you are done you can now add the disinfectant on a clean bowl. Place the disinfectant close to the prim of the bowl so that when you place your nail clippers they will be submerged. This ensures the disinfectant acts on every part for more reliable results.
Step 2: Sterilize Using Heat
Heat is one of the most effective ways of sterilizing nail clippers. You need to prepare your sterilizer by setting it to the right temperatures that microorganisms won’t survive. Autoclaves sterilizers can work perfectly. Let the sterilizer warm up as you wipe your nail clippers to remove surface germs. Sterilize your clippers at a temperature of 170°C for approximately one hour. You will require cloves because heat is transmitted on Metallic objects.
Therefore, the temperature that the nail clippers are subjected to ensures there are no bacteria or any other microorganisms that can survive beyond such a limit. Once you are done you can give it some time to cool before your remove from the sterilizer.
Step 3: Use Barbicide
This is a solution that is normally used to sterilize razors, hair clippers, and scissors. You will find that it is largely used in Barber and beauty shops. This solution helps in killing harmful bacteria and fungus that might be present in the nail clipper. Therefore you can immerse your nail clippers in Barbicide solution and dry it using a clean cloth after some time.

Step 4: Use Hot Water And Rubbing Alcohol
This is yet another effective method that requires you to start by boiling water and placing nail clippers for approximately 5 minutes. Afterward, use a toothbrush to remove stubborn dirt. Soak a paper towel in rubbing alcohol then wipe the clippers using the soaked towel. This ensures germs trapped in the nail clippers are killed effectively. After doing so use a clean towel and to dry the nail clippers.
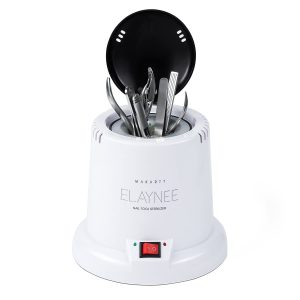
Step 5: Use UV Sterilizers
UV sterilizers are very effective when it comes to sterilization. Some sterilizers use UV lights to disinfect items such as nail clippers. You only need to expose your nail clippers for 45 to the UV lights and all the harmful bacteria will be cleaned. You can get a UV sterilizer that will help you to achieve effective sterilization.

Step 6: Use A Bleaching Agent
Bleaching agents are great when it comes to sterilization of nail clippers. Therefore, ensure you have a high-quality bleaching agent. Pour it into a glass bowl and immerse your nail clippers. Leave it for approximately 10 minutes. Remove it using a pair of tweezers and clean it using a clean cloth. Ensure it is dried effectively to ensure no bleaching agent remains on the nail clipper.
How To Store Your Sterilized Nail Clippers?
When you sterilize nail clippers, you need to store them in a specific way to avoid re-contamination. To store your sterilized nail clippers, the best place is in the sterilizer itself. However, if you don’t have a sterilizer, you can store your nail clippers in a container with a tight-fitting lid. If you use an open container, make sure to keep it away from other objects that could contaminate it. You can also store them in a zip-lock bag, a jar, a plastic cup or container, or a glass bowl. The best place to store your nail clippers is in a cool, dry, dark place. If you’re not sure where to put your clippers, you can store them in a drawer. Just make sure to keep them away from sharp objects that could hurt your baby.
Tips
Sometimes you might need to remove build-up dirt manually using a toothpick and a brush. Use the toothpick to loosen some stubborn dirt that normally accumulates around the edges. Afterward, use a bristle brush to scrub off the loose dirt until no dirt is trapped in the nail clippers. Once you are done you can use your sterilizer to ensure that the nail clipper is effectively sterilized before use. This is a simple and convenient method that you can use at home. I hope now you get how to sterilize nail clippers at home.
You may also read: How to Sterilize Tweezers Safely at Home
Final Verdict
With the right tools and materials, you can sterilize your nail clipper in a matter of minutes! We hope you enjoyed our blog on how to sterilize nail clippers. This blog post will help you ensure your clippers are always ready to go, so you can keep them in the first aid kit and keep your nails trimmed and neat!
After sterilization, it is important to store your nail clippers carefully so that it doesn’t come into contact with contaminated surfaces. This might render the sterilization process useless. Additionally, nail clippers are personal items so they should not be shared. This is to ensure you stay safe and healthy. This was a great learning experience for us and we are so glad that we got to share it with the world! If you have any questions, please don’t hesitate to reach out to us. Thank you so much for reading!