
There are a lot of people that are considering the idea of doing their dental work at home. We are no exception. There are a few things that you have to take care of before you can perform any dental work. One of these things is sterilization.
Recently, I’ve been asked a lot of questions about how to sterilize dental instruments at home. This is because many people are now using homemade toothbrushes and other items that need to be cleaned regularly, but they do not know the best way to clean them.
So, in this article, we will look into some ways you can use to sterilize your personal hygiene products, such as toothbrushes or mouthwashes. And we will take a look at the critical methods for how to sterilize dental instruments at home.
What you need to sterilize dental instruments?

- Dental instruments container with lid
- Sanitizing solution
- Drying rack
- Personal protective equipment- gloves, face mask, goggles, apron
Dental instruments are the instruments that dentists use to perform dental procedures. These tools are designed to help reduce the risk of you getting an infection from the dental care. But, it is not easy to maintain the hygiene of these instruments. If you do not sterilize them correctly, then you run the risk of your investment being ruined. This blog will be your guide for sterilizing your dental instruments at home.
Step 1: Cleaning and fitting Your Hygiene Products
The first step involves washing your hands thoroughly with soap and water before starting the procedure. Make sure that you clean both sides of your fingers and wrists too. After rinsing, dry your hands by rubbing them together vigorously until no moisture remains. Then apply moisturizer to keep your skin soft and supple.
Next, put on your gloves first, followed by your mask, goggles, and finally, your apron.
Step 2: Determine the sterilization method
Now that we’ve prepared our disinfectant solutions, it’s time to determine how best to sterilize your dental instruments.
Step 3: Perform the procedure
You’ll start by cleaning your dental tools first before proceeding to the actual sterilization process. From the below discussed methods, choose the most appropriate one for your needs.
The Methods on How To Sterilize Dental Instruments at Home
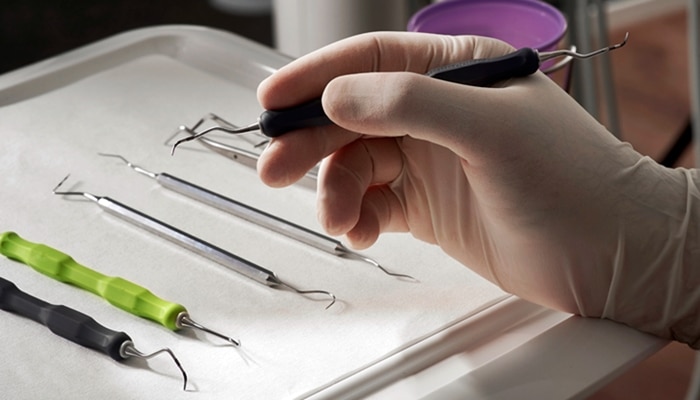
When you purchase and use dental instruments, it is important that you sterilize them before and after using them. This means that you may need to sterilize them when you are finished using them and before you use them the next time. There are a few methods that you can use to sterilize your instruments. Below are the common methods of sterilization and the steps that each entails:
How To Sterilize Dental Instruments In Oven?
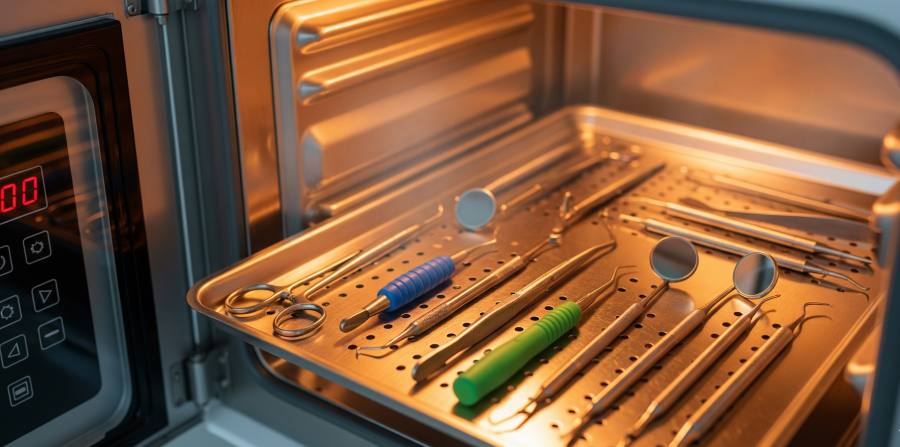
Sterilization is a process that helps to eliminate the risk of harmful microorganisms. Many people are interested in how to sterilize dental instruments at home using the oven. Sterilizing dental instruments at home is not difficult. Actually, this is one of the cheaper ways to get rid of bacteria. You only need to know a few items and you are good to go. If you want to learn this method, keep reading.
If you’re planning on baking your dental instruments in oven, it is important that you check the temperature in the oven. You can use a dental oven thermometer to check the temperature. If you use a temperature that is too high, it could damage your instruments. You will need to place the rack in the oven for 10 minutes at the highest setting, then turn them off, let them cool on the rack, and then place them back in the oven to finish cooking. This will kill 99% of bacteria.
If you do not have a rack, you can place the instruments on a cookie sheet. After you cook the instruments, let them cool and then put them in a zip-loc bag and place them in the freezer for later use.
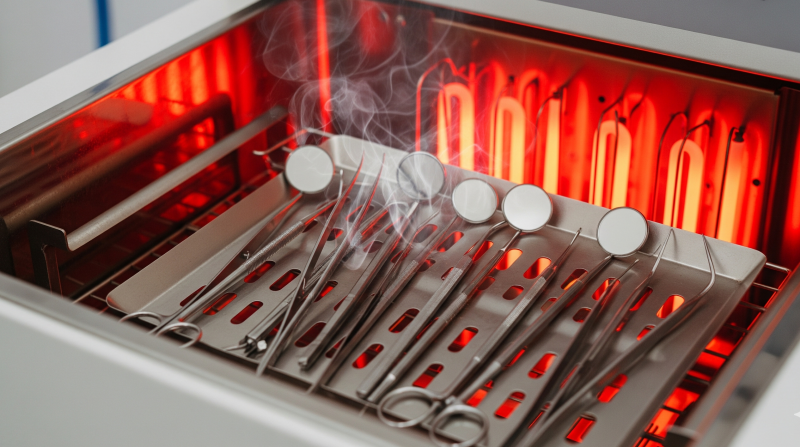
How To Sterilize Dental Instruments Using Steam Autoclaves?
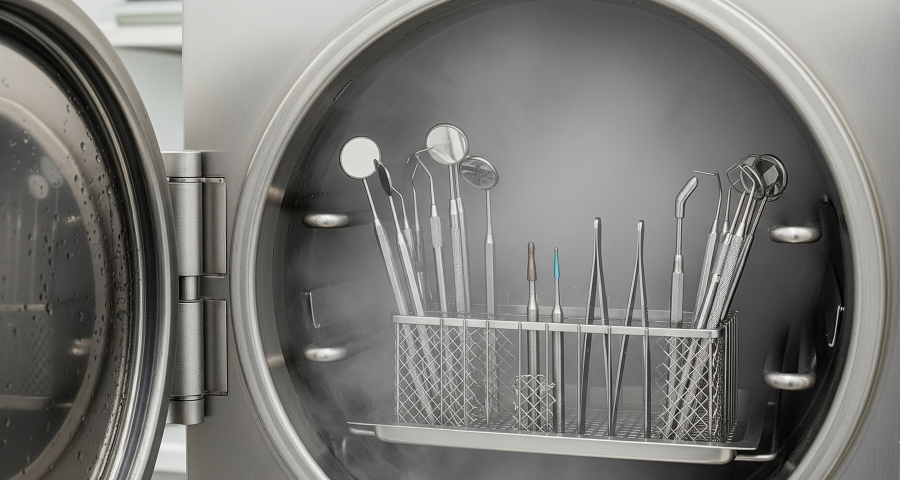
Steam autoclaves are ideal for sterilizing small items like toothbrushes and tongue scrapers. They come equipped with racks where you can store these objects while they undergo the sterilization process. Steam autoclaves have been around for decades now and are considered safe because they do not emit harmful gases.
However, make sure that you follow the manufacturer’s instructions when operating one. Also, note that steam autoclaves cannot be operated without electricity, so ensure a power supply is available.
These are our choices for the 5 best autoclave sterilizers in the Market :
1. Tuttnauer 1730 Valueklave Ideal Autoclave Sterilizer (click here to view)
2. VEVOR Professional Ultrasonic Cleaner 10L/2.5 Gal and Autoclave Sterilizer (click here to view)
3. APHRODITE 300W Mini High Temperature Sterilizer Medical Autoclave Equipment 1.5L (click here to view)
4. 18L Surgical Instruments Autoclave Steam Stainless Steel Steriliz~ation Machine (click here to view)
5. 18L Dental Automatic Autoclave Steam With Dry Function Science Chamber Equipment (click here to view)
How To Sterilize Dental Instruments Using Pacifier Sterilizer?
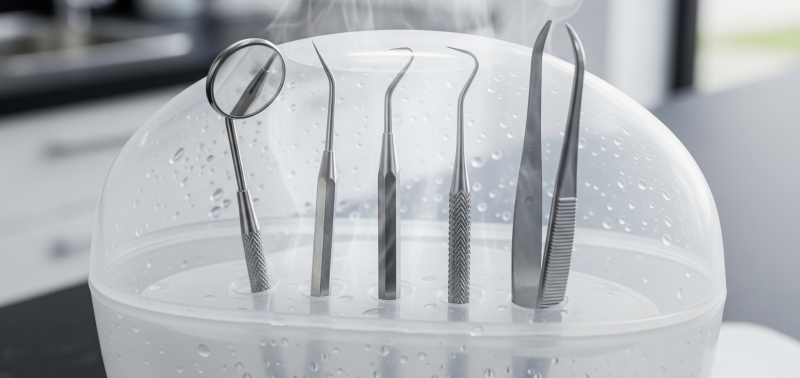
Pacifiers are explicitly designed for sterilizing large medical devices such as endoscopes or surgical knives. However, they can be used for personal dental instruments as long as their size does not exceed 1 inch. Pacifiers work by circulating hot air through an enclosed chamber which then heats the surrounding area.
This causes the temperature inside the chamber to rise above 100 degrees Fahrenheit within seconds. The heated air then travels outwards from the chamber and comes into contact with all surfaces, including those of your dental instruments. Once this happens, the surface will become sterile.
These are our choices for the 3 Best Pacifier Sterilizers in the Market
1. GROWNSY SPortable UV Light Sanitizer Box (click here to view)
2. SPapablic Portable UV Light Sterilizer, Mini UV-C Sanitizer Box for Pacifier  (click here to view)
3. Dr. Brown’s™ Microwave Steam Sterilizer Set  (click here to view)
How To Sterilize Dental Instruments Using Chemical Disinfectants?
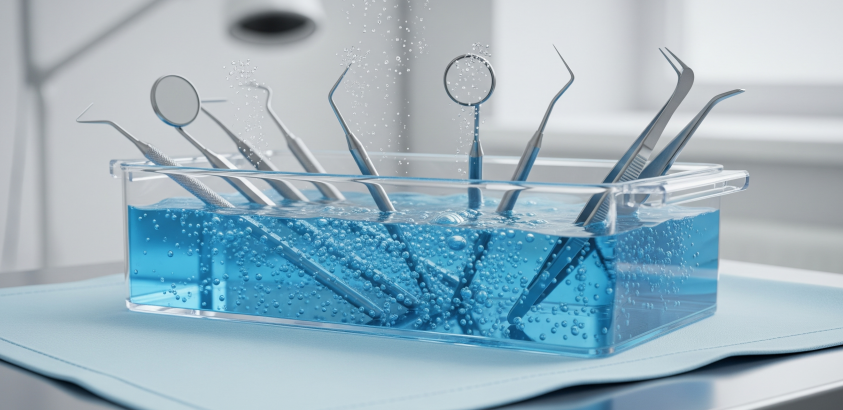
Chemical disinfectants are also known as “chemical cleaners.” These products contain chemicals that kill bacteria to prevent them from spreading diseases. Most commonly found among dentists are sodium hypochlorite and glutaraldehyde. Bleach works very effectively against most types of microorganisms but has limited effectiveness against viruses.
Glutaraldehyde is effective against both bacteria and viruses. It should be noted, though, that neither product kills spores. Therefore, even after being properly cleaned and disinfected, spore-forming organisms may remain on your dental instruments.
How To Sterilize Dental Instruments Using High-Temperature Heating?
High-temperature heat is another way to sterilize your dental equipment. You would need to place your dental instruments directly over a flame source until they reach the desired temperature. For example, you might want to set your mouth mirror over a gas stove burner for about 3 minutes.
Make sure that you use only low flames since higher temperatures could damage your dental instruments. Once you know what type of sterilization method you’d prefer to use, let’s move onto.
How Do Dentists Disinfect Their Tools Usually?
Dentists sterilize their equipment for the same reason you would sterilize your household items. One of the most important things dentists do is sterilize their equipment. Dentists are required to clean, disinfect, and sterilize the equipment they use. There are several different methods that dentists use to sterilize equipment. This blog post discusses the sterilization process dentists use to clean equipment and how it varies depending on the type of equipment.
Dentists clean their equipment using a high-pressure water system that serves to sterilize their tools. This is done by placing them in an autoclave, which is a type of chamber used to heat the water under pressure. The heat treatment lasts for about 30 minutes and the water is then cooled and reused.
More general sterilization is accomplished with a dry heat process that uses a low-pressure steam. This sterilization lasts for as long as six hours and is not reused. This can release carbon dioxide, which is toxic to the tissues being sterilized. Dentists use a number of other techniques to kill bacteria, including boiling the equipment and exposing it to chemicals.
Tips
If you’re looking forward to keeping your dental instruments cleaner longer, there are certain things you can do to help ensure that they stay germ-free for much more extended periods.
- Always wash your hands before touching any part of your body. Wash your hands well enough so that no traces of soap remains.
- Avoid sharing utensils like toothbrushes, razors, etc., between family members. This prevents cross-contamination, which means that one person’s germs get transferred to others’ mouths.
- Use disposable gloves while performing oral procedures such as brushing or flossing. Disposable gloves protect your skin from getting infected. They also make it easier for you to avoid contaminating yourself.
Caution
Never forget to dispose of used items once their purpose has been fulfilled. Never throw these materials out without proper disposal methods. Doing this not only endangers our environment but also puts us all at risk of contracting various infections.
Final Verdict
We hope you enjoyed our blog about how to sterilize your dental instruments at home. This blog post was written with the goal of helping to educate dental professionals and individuals on how to properly sterilize their dental instruments at home. Sterilizing your dental instruments is essential if you wish to prevent the spreading of diseases through your mouth. There are many ways to achieve this goal.
However, choosing the right technique depends entirely upon your preference and budget. The best thing to remember is that whatever method you choose should be safe and effective. Be sure to follow instructions carefully and always use caution whenever working around sharp objects. Thank you for reading, we’re always excited when one of our posts is able to provide useful information on a topic like this!
People also ask – FAQs
Infections including HIV, hepatitis B, and hepatitis C can spread if dental instruments aren’t adequately sterilized. To safeguard both you and your patients, it’s crucial to adhere to correct sterilization practices.
After each usage, dental instruments should be sanitized to stop the spread of bacteria. Even if the equipment are not regularly used, they nevertheless need to be cleaned at least once a month to keep them clean.
You can use a chemical indicator, like heat-sensitive tape, or a biological indicator to make sure your dental equipment are properly sterilized. When the sterilization process is successful, these indicators either alter in color or give off other visible signals.
Reusing water or sterilization solutions is not advised. Reusing these solutions after they have become contaminated can result in inefficient sterilization and the spread of illness. For each sterilization cycle, it is best to use new solutions and water. To stop the transmission of infection, it’s also critical to properly dispose of any infected items, such gloves or gauze.
Dental equipment should be stored in a clean, dry area after being sterilized at home in order to preserve their cleanliness. Instruments should ideally be kept in a covered bag or pouch that is reserved solely for sterilized items. By doing this, contamination from dust or other particles will be reduced. To prevent re-contamination, it’s also crucial to handle the instruments using clean gloves.