
As a parent, what is one unique factor you consider when buying your baby’s feeding bottles? Well, it has to be the brand! One of the most recommendable feeding bottles brands in the whole world is non-other than Dr. Brown bottles. Most parents prefer these bottles because they are durable, and babies are more comfortable when feeding with them as opposed to others. But they don’t know how to clean Dr. Brown’s bottles perfectly. Although these feeding bottles have quality feeding modes, we can’t ignore the fact that they are a bit difficult to clean.
Therefore, it is crucial that you also learn how to clean Dr. Brown bottles. Cleaning Dr. Brown’s bottles may take more time due to the design and the material. If you don’t know the right procedure to follow when cleaning the bottles, This blog post will provide you with an overview of how to clean Dr. Brown’s bottles.
What is the best way to clean Dr Brown bottles?
Dr Brown bottles are designed for use with infants, but you will find that they will last for years and years. However, when you take proper care of your bottles, they will last for even longer. There are several ways to clean them, like using a sterilizer, using warm water and soap or with a brush. This will make the bottles look and feel like new. Remember to clean your hands before you clean the bottles and to use a fresh cloth for each bottle. Let’s follow A step by step guide on how to clean Dr Brown bottles.
How to clean Dr Brown bottles with Dr Brown Baby Bottle Sterilizer?
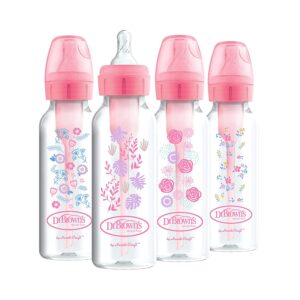
Dr Brown bottles are an excellent choice for babies of all ages. They are made from BPA-free Eastman Tritan plastic, which is safe and durable. If you have a Dr Brown bottle, you may wonder how you can clean the bottle. Dr Brown has a product called the Dr Brown Baby Bottle Sterilizer that makes cleaning the bottle much easier. It eliminates the need for boiling water and soap. Just put the bottle in the sterilizer and it will clean, sanitize and dry the bottle. It also comes with a bottle brush and a cap. Dr Brown recommends using the Baby Bottle Sterilizer every time you clean your bottle.
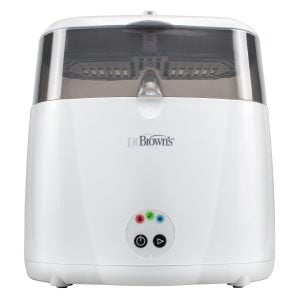
Dr. Brown's Deluxe Bottle Sterilizer
How to clean Dr brown bottles with soap and hot water ?
Cleaning your Dr. Brown bottles is a necessity. But with the many new bottles available today, it’s harder to know how to clean them. The detailed instructions below will clear up any questions you have about whether or not you can clean your Dr. Brown bottles with soap and hot water.
Disassemble The Bottle
All bottles require being disassembled for efficient cleaning of all parts. Dr. Brown bottles have more parts as opposed to other standard feeding bottles. So, make sure to remove all the necessary components for cleaning. If you are not sure regarding the parts to disassemble, check the manual user instructor as it features the disassembling steps. The removable parts on Dr. Brown’s bottles include; the cap, nipple collar, vents insert, vent reservoir, and also the travel- disc.
Soak The Bottle Parts in Soap and Hot Water
You should soak baby’s feeding utensils in hot water and dishwashing soap to loosen dirt and kill germs. Dr. Brown feeding bottles feature durable and sturdy plastic material that is resistant to heat damage, and thus, you can comfortably soak them in hot water. If you don’t have an enormous cleaning bowl, use the sink to create ample space to soak the dishes and prevent them from piling on each other. Other soaking surfaces to use include; disinfected clean bucket or basin. Soak the bottles for about 20 minutes.
Clean The Bottle
This is the step that one needs to take time and be cautious to make sure you thoroughly clean the bottles. Kids are quite sensitive, and when it comes to hygiene, you should ensure thorough cleaning of their items, most notably the feeding utensils. Dr. Brown bottles are packed with one or two cleaning brushes that you can use for scrubbing. But, you can supplement it with a brush of your choice.
How to clean Dr. Brown bottles with a brush?
Run the brush through the interior part of the bottle all around. Pay more attention to the nooks, crannies, and even grooves to ensure all the milk residuals that may have stuck on the bottle are eliminated. Repeat the same on other parts of the bottle, especially the lid and the nipple collar.
If you are using a dishwasher, make sure to arrange all the small parts of the bottles on the dishwasher rack to prevent them from falling off when you run the machine. Dr. Brown bottles also come with a dishwasher rack that you can utilize. Follow the guide on how to clean Dr Brown bottles with a dishwasher, especially regarding the time to set to clean the bottles.
Rinse The Bottles
Ones you are done cleaning all the bottle parts, the next step is to rinse off the soapy dirt water. You can use the same surface to rinse the bottle. So, if you are using the same cleaning surface, pour/drain the soapy water, and clean the basin or sink with clean water. You should rinse the bottle components using running water to ensure total rinse off.
Also, start with hot water, followed by lukewarm water. The hot water is recommendable to eliminate all the germs and bacteria that may be on the bottle parts. Run water through the nipple hole to ensure complete rinsing and removal of the soap residuals.
Dry The Bottles
Ones you are done cleaning the bottles, do not assemble immediately but instead allow them to air and dry slowly. Also, lay them on a clean surface and leave them to dry on their own before joining. Dr. Brown’s bottles packs come with a drying rack where you can store the bottles to dry out after cleaning. Arrange the parts of the bottles on the tray and put them in a transparent and open area to dry up.
Sterilize The Bottles
Apart from learning how to clean Dr Brown bottles, you must learn how to sterilize the bottles as well using a sterilizing machine. Sterilizing the baby’s bottles is done periodically and can be done using Dr. Brown Deluxe baby bottle sterilizer machine that is quite easy to use. Dr. Brown deluxe baby sterilizer features a style that accommodates all the bottle parts, including the small ones.
What's the proper way to store Dr Brown bottles?
Dr Brown has been making bottles for years. Dr Brown bottles are a popular product because they are easy to use and they are reusable, which saves you money. However, they do need some care, which is why you should always wash them and store them properly. There are so many different styles, sizes, and options that it can be a little overwhelming when you get your first batch of bottles.
For example, what’s the proper way to store Dr Brown Bottles? Obviously, they should be stored in a safe place where they won’t get bumped around, but what about the lids? Dr Brown recommends storing their lids in a safe place. They recommend putting them in a bag or container. Better yet, you can purchase a lid keeper that will keep your lids safe and secure.
There are some ways to store Dr Brown bottles as well. However, the best way to store Dr Brown bottles is to store them vertically, as it will prevent the bottles from being knocked over and broken. You should also clean them on a regular basis.
The best way to clean Dr Brown bottles is to use a Dr Brown bottle sterilizer or bottle brush, but you can also use a toothbrush or paper towel. It is important to be careful when cleaning Dr Brown bottles, as you don’t want any water to get in the glass part of the bottle.
People also ask - FAQs
Dr. Brown's bottles can be cleaned in the dishwasher, but it's vital to disassemble them first, use a detergent safe for babies, set the dishwasher to a gentle cycle, and inspect the bottles afterward for any leftover residue. You can safely and easily keep your baby's bottles clean and hygienic by taking these precautions.
Disassemble the Dr. Brown's bottle and give each component a thorough rinse in warm water to clean the vent. After that, thoroughly scrub the vent insert with a bottle brush or toothbrush after soaking it in warm, soapy water. After rinsing, disinfect the vent insert by boiling it in water for five minutes or by using a sterilizer.
After each use, Dr. Brown bottles should be cleaned to avoid the growth of bacteria and other dangerous elements. It is advised to thoroughly clean the bottles if you use them often at least once a week by sterilizing or boiling the parts for five minutes.
Dr. Brown bottles can be soaked for about 30 minutes in a solution of equal parts water and white vinegar if they contain tough stains. After removing the stains with a bottle brush and giving the components a good rinse in clean water, move on.
Indeed, it's crucial to avoid using abrasive or harsh cleaning agents while cleaning Dr. Brown bottles because they can harm the parts. Instead, wash the components with a mild dish soap and a gentle bottle brush before giving them a good rinse in clear water. Avoid using bleach or any alcohol-based cleaners because these can also harm the parts.
Final Verdict
Although Dr. Brown bottles are the best feeding bottle brand in the market, one needs to be extra careful when cleaning these bottles for hygiene purposes. They are quite smooth to clean as long as you follow the right procedures. This brand also provides the necessary cleaning items, such as the cleaning brushes and the cleaning racks.
So, use the above steps to guide you on how to clean Dr Brown bottles. Also, follow the manufacturer’s instructions regarding how to sterilize the bottles and how often to do it.