Microblading is a semi-permanent procedure that involves the use of tiny needles to create fine, hair-like strokes on the skin to enhance its appearance. It is a safe and effective way to improve the look of eyebrows. But it requires meticulous attention to detail and sterile tools.
You might have tried to sterilize your microblading tools before, but you may not have had the best experience. There are some essential things that you need to know about sterilizing your tools.
However, this article will discuss why sterilization is so important for microblading, how it can be done properly, and what steps need to be taken in order for microblading procedures to be carried out safely.
Types of Microblading Tools
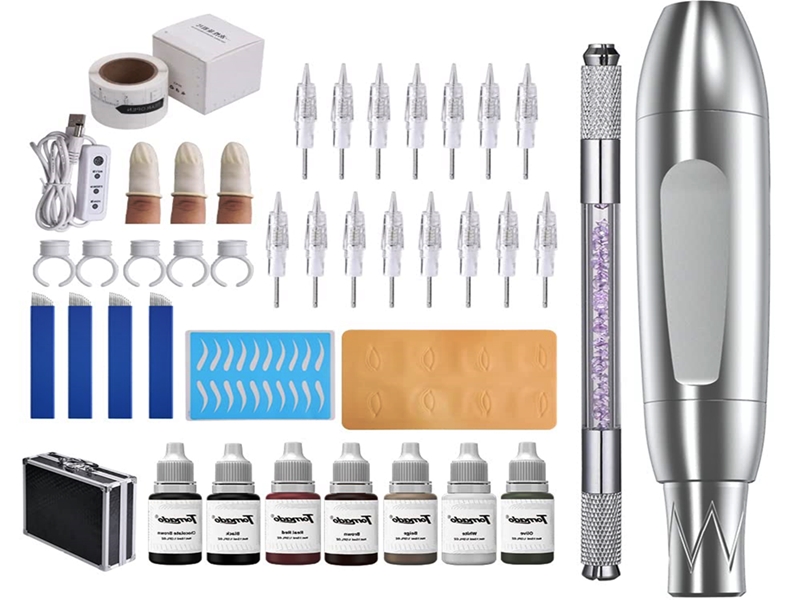
Microblading tools come in different shapes and sizes to achieve different effects. It is important to choose the right tools for the job. The artists should be trained on how to select, use, and sterilize their tools properly to ensure the safety and satisfaction of their clients. Here are the three main types of microblading tools:
Blades: Microblading blades, also known as microblades, are small, disposable, handheld tools with a row of tiny needles arranged in a straight or curved shape. The needles are used to create precise incisions in the skin that mimic the look of natural eyebrow hairs. Blades are available in different sizes and shapes to create different hair stroke patterns.
Pens: Microblading pens, also called microblading holders, are reusable and are designed to hold microblading blades. They typically have a lightweight and ergonomic design, making them comfortable to hold for extended periods. Pens come in various shapes and sizes and some have adjustable needles to customize the depth and width of the incisions.
Needles: Microblading needles, also known as shader needles, are used to create a shading effect or to fill in areas of the eyebrows with pigment. They are slightly larger than microblading blades and are available in various configurations, such as round, flat, and curved. The needles are designed to create a soft, diffused look. It can be used in combination with microblading blades to achieve a more natural-looking result.
You may also read: How to Sterilize Tweezers Safely at Home
Preparing Microblading Tools for Sterilization

Before microblading tools can be sterilized, they must be properly cleaned and disinfected to remove any dirt, debris, or microorganisms that may be present. Here are the three steps to preparing microblading tools for sterilization:
Cleaning: The first step is to clean the tools thoroughly to remove any visible dirt or debris. This can be done by washing the tools in warm, soapy water using a soft brush or cloth. Avoid using harsh chemicals or abrasive scrubbers as they may damage the tools. Rinse the tools with clean water and pat them dry with a clean towel.
Disinfecting: The next step is to disinfect the tools to kill any microorganisms that may be present. This can be done by soaking the tools in a high-level disinfectant solution that is approved for use on medical instruments.
The solution should be prepared according to the manufacturer’s instructions. The tools should be soaked for the recommended amount of time, usually between 10 and 30 minutes. After disinfecting, rinse the tools with sterile water or alcohol to remove any residual disinfectant.
Drying: Once the tools have been cleaned and disinfected, they must be completely dry before sterilization. Moisture can interfere with the sterilization process and compromise the effectiveness of the sterilization method. To dry the tools, place them on a clean, dry surface or use a sterile towel to pat them dry. Avoid using a hairdryer or other heat source as this may damage the tools.
Preparing microblading tools for sterilization involves cleaning, disinfecting, and drying the tools to remove any visible debris and kill any microorganisms that may be present. Proper preparation is crucial to ensure that the tools are properly sterilized and safe for use on clients.
How to Properly Sanitize Your Microblading Tools?
Microblading is a popular beauty treatment that requires the use of special tools to create the desired look. To ensure safety and hygiene, it is important to properly sanitize these tools after each use.
By following these steps, you can ensure that your microblading treatments are as safe and effective as possible. There are several methods of sterilizing microblading tools, including:
Sterilizing microblading tools using high-temperature cabinet
Sterilizing microblading tools is crucial to maintain hygiene and prevent the spread of infection. So, a high-temperature metal tool cleaning sterilizer box is a great tool to achieve sterilization, and the process is relatively straightforward.
Recommended High Temperature Metal Tool Cleaning Boxes
1. Giff 300W Heat Sterilizer NV-210 w/ Timer Disinfection Box (click here to view)
2. High Temperature Metal Tool Cleaning Box 110V 300W 1.5L with Timer (click here to view)
3. Soiiw High Temperature Metal Tool Cleaning Box 110V 300W 1.5L with Handle (click here to view)
4. High Temperature Multi-Functional Cleaning Box 300W (click here to view)
The process starts by cleaning the microblading tools thoroughly using a gentle soap and warm water. Rinse them to remove any soap residue and dry them completely using a clean, lint-free cloth.
Then, place the cleaned and dried microblading tools in a plastic container and put it into the high-temperature metal tool cleaning sterilizer box. Make sure the tools are arranged in a way that allows the hot air to circulate around them freely.
Now, close the sterilizer box securely and turn on the power, setting it to the recommended temperature and time as per the manufacturer’s instructions. Typically, the temperature is set to 180°C (356°F) and the sterilization process takes around 30 minutes.
Once the sterilization cycle is complete, turn off the power and allow the sterilizer box to cool down before opening it. Use sterile forceps or gloved hands to remove the microblading tools from the sterilizer box. Store the sterilized microblading tools in a clean, dry place until you’re ready to use them.
Note: It's important to follow the manufacturer's instructions for the high-temperature metal tool cleaning sterilizer box to ensure proper sterilization of the microblading tools. Additionally, make sure to wear appropriate personal protective equipment, including gloves and eye protection, when handling the tools during and after sterilization.
Sterilizing microblading tools using dry heat
Dry heat sterilization involves heating the microblading tools to a high temperature for a set amount of time. This method is effective for sterilizing instruments that cannot be exposed to moisture, such as powders, oils, or waxes. Dry heat sterilizers can be used for metal and glass instruments and require a longer exposure time than an autoclave.
Sterilizing microblading tools using ultraviolet light

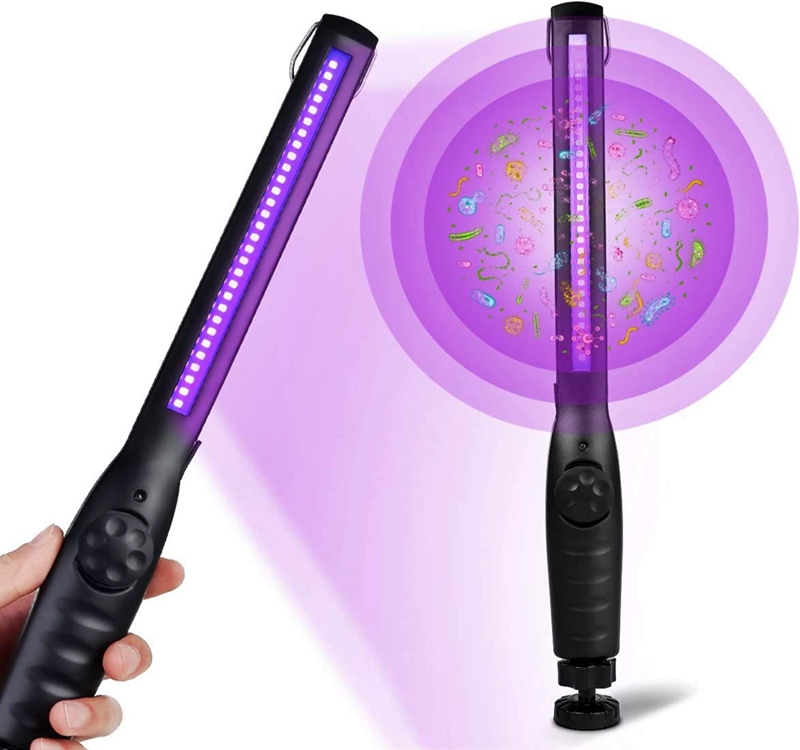
Ultraviolet (UV) light sterilization involves using a UV light box or cabinet to sterilize microblading tools. The UV light kills microorganisms by disrupting their DNA. This method is effective for sterilizing surfaces and air in a controlled environment but may not be as effective as other methods of sterilization for instruments that have been heavily contaminated.
There are several methods of sterilizing microblading tools, including autoclaving, dry heat sterilization, chemical sterilization, and UV light sterilization. Each method has its advantages and limitations. So, the choice of method will depend on the type of instruments, the level of contamination, and the availability of equipment.
Microblading artists and establishments should follow strict sterilization protocols and use the appropriate method of sterilization to ensure the safety and wellbeing of their clients.
Sterilizing microblading tools using chemicals
Chemical sterilization involves soaking the microblading tools in a solution of liquid chemicals that kill microorganisms. This method is effective for sterilizing heat-sensitive instruments that cannot be autoclaved or exposed to high temperatures. However, it may not be as effective as autoclaving or dry heat sterilization in killing all types of microorganisms.
It is important to note that being allergic to the chemicals used for sterilization is rare. However, if you experience symptoms such as difficulty breathing, swelling of the face or throat, or severe skin rash, seek immediate medical attention.
What to do if you’re allergic to Chemicals Sterilization?
If you’re allergic to chemical sterilization, a good place to start is using a steam sterilizer. Steam is a sterilization method that uses heat and water vapor that are in the form of a mist. It is a disinfection method that kills the microbes without destroying them. It is considered a physical method of sterilization.
Safety Measures During The Process

In addition to proper sterilization, microblading artists and establishments should take safety measures to protect themselves and their clients. Here are some safety measures that should be followed:
Personal Protective Equipment: Microblading artists should wear personal protective equipment, such as gloves, masks, and eye protection, to prevent exposure to bloodborne pathogens and other contaminants.
Handling and Disposing of Sharps: Microblading artists should handle and dispose of sharps, such as needles and blades, properly to prevent accidental injury or contamination. Sharps should be disposed of in puncture-resistant containers that are labeled as biohazardous waste.
Keep the workspace clean and organized: So, a clean and organized workspace can reduce the risk of contamination and make it easier to sterilize tools and supplies.
Use a sterilization log: A sterilization log is a record of all sterilization procedures performed on microblading tools and supplies. Therefore, the artists and establishments can use a sterilization log to ensure that all tools and supplies are properly sterilized and to track the expiration dates of sterilized items.
Emergency Preparedness: Microblading establishments should have emergency protocols in place in case of an accident or injury. These protocols should include procedures for responding to blood spills, calling emergency services, and providing first aid.
Stay up-to-date with industry standards and regulations: Microblading artists and establishments should stay up-to-date with industry standards and regulations related to sterilization and safety. They should attend training sessions and conferences, read industry publications, and follow the guidelines set by regulatory agencies such as the Centers for Disease Control and Prevention (CDC) and the Occupational Safety and Health Administration (OSHA).
By following these safety measures, microblading artists and establishments can further reduce the risk of cross-contamination and provide a safe and satisfying experience for their clients.
Best Ways to Store Microblading Tools
After microblading tools have been properly sterilized, they must be handled and stored correctly to maintain their sterility. You need to store your microblading tools in a clean, dry environment that is free from dust and other contaminants.
Tools should be stored in sealed packages or containers to prevent them from becoming contaminated before use. The storage area should be labeled to prevent confusion and ensure that tools are used before their expiration date.
Wrapping Up!
Sterilizing microblading tools is essential to prevent the transmission of infectious diseases and ensure the safety of clients. We hope you enjoyed our blog post on how to sterilize your microblading tools.
Of course, there are a variety of ways you can sterilize these tools. But we found these to be the most effective and easiest to remember steps. We provide all the information you’ll need to help you sterilize your tools in a quick and easy manner. It’s always a good idea to be safe and do what you can to make sure you are keeping your equipment clean and in top shape!
We encourage you to contact us anytime with any questions or feedback. Thank you for reading, we would love to hear from you!
People also ask – FAQs
To stop the spread of infections or diseases that can be communicated by blood or bodily fluids, sterilizing microblading equipment is crucial. Tools that may include bacteria, viruses, or fungi are eliminated during sterilization, making them safe to use on patients.
Sterilization is required for all microblading equipment before and after usage. This guarantees that they are untainted and secure for use on patients.
Do not use your microblading tools on customers if you have any reason to believe they are infected. Use a suitable sterilization technique right away to sterilize the tools, or dispose of them properly. Finding the contamination’s cause is crucial, as is taking action to stop it from happening again in the future.
Indeed, sterilizing microblading equipment in an autoclave is a very effective approach. The autoclave employs high-pressure steam to sterilize the instruments, destroying all bacteria and spores that may be present.
Infections and diseases like HIV, hepatitis, and bacterial infections can spread if microblading equipment is not adequately sterilized. To guard against these hazards for both you and your clients, sterilization must be taken carefully.

