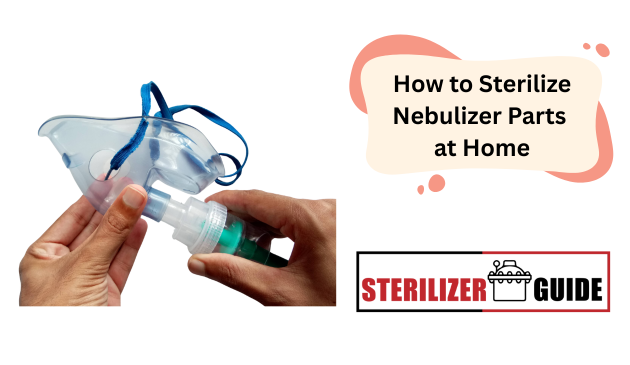
Sterilizing your nebulizer parts is one of the simplest yet most important steps you can take to protect your health. Learning how to sterilize nebulizer parts properly ensures that traces of medication and moisture left behind after each use do not become a breeding ground for bacteria, mold, and other harmful microorganisms. Without proper sterilization, these contaminants can be inhaled during treatment, increasing the risk of infection and worsening respiratory conditions.
Clean equipment ensures that your medication is delivered effectively and safely. It also keeps the device functioning properly, prevents buildup, and extends its lifespan. Whether you use a nebulizer daily for chronic conditions or occasionally for acute symptoms, consistent sterilization helps maintain both hygiene and performance.
Understanding why sterilization matters is the first step toward building a safe and reliable routine for respiratory care. In the next sections, you will learn how to properly clean and sterilize each part of your nebulizer to ensure every treatment supports your recovery and overall wellbeing.
Understanding Your Nebulizer Parts
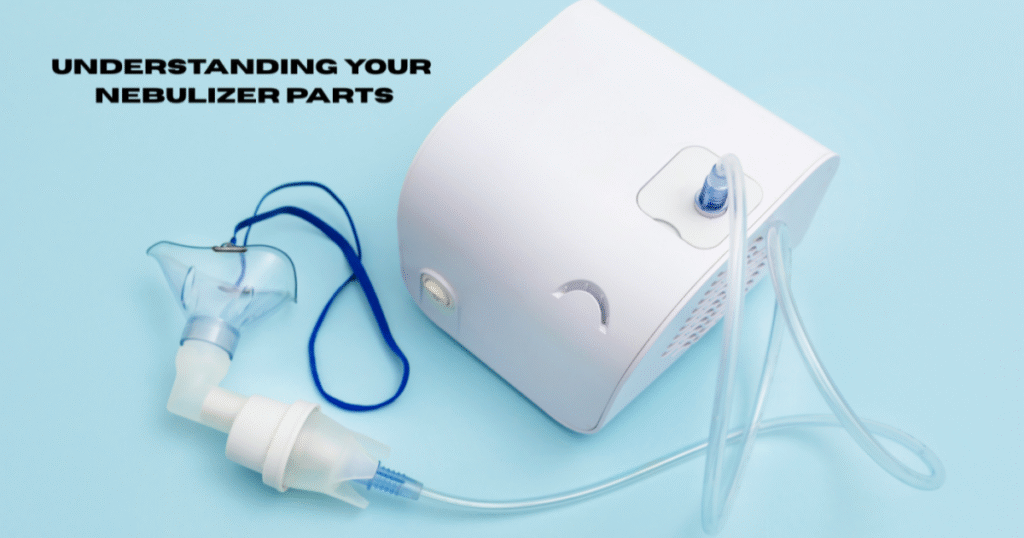
Before learning how to sterilize a nebulizer properly, it is essential to understand the components that make up the device. Each part has a specific function, and knowing how they work together helps you clean and maintain them more effectively.
A typical nebulizer consists of the following key components:
1. Medication Cup or Chamber
This is where the prescribed liquid medication is placed. The nebulizer converts this liquid into a fine mist for inhalation. Because medication passes directly through this part, it must be sterilized thoroughly to prevent contamination.
2. Mouthpiece or Mask
The mouthpiece or mask delivers the medicated mist directly into your airways. Masks are often used for children or those who find it difficult to use a mouthpiece. Both require careful cleaning and sterilization after each use since they come in direct contact with your mouth and nose.
3. Tubing
The tubing connects the medication chamber to the air compressor, allowing airflow to turn the liquid into mist. While it usually does not come into contact with the medication directly, condensation can accumulate inside, making it important to keep the tubing dry and occasionally sanitized.
4. Air Compressor or Nebulizer Machine
This is the main unit that generates the airflow needed for the treatment. The compressor itself should not be submerged in water or sterilized but should be wiped clean with a dry or slightly damp cloth to prevent dust buildup.
5. Filters
Many nebulizers have air filters that prevent dust and bacteria from entering the airflow. These filters should be checked regularly and replaced as directed by the manufacturer.
Understanding each component helps ensure that every part receiving medication or moisture is cleaned correctly. This knowledge forms the foundation for the sterilization steps that follow, ensuring you achieve both safety and efficiency in every treatment session.
Cleaning vs. Sterilizing: What’s the Difference
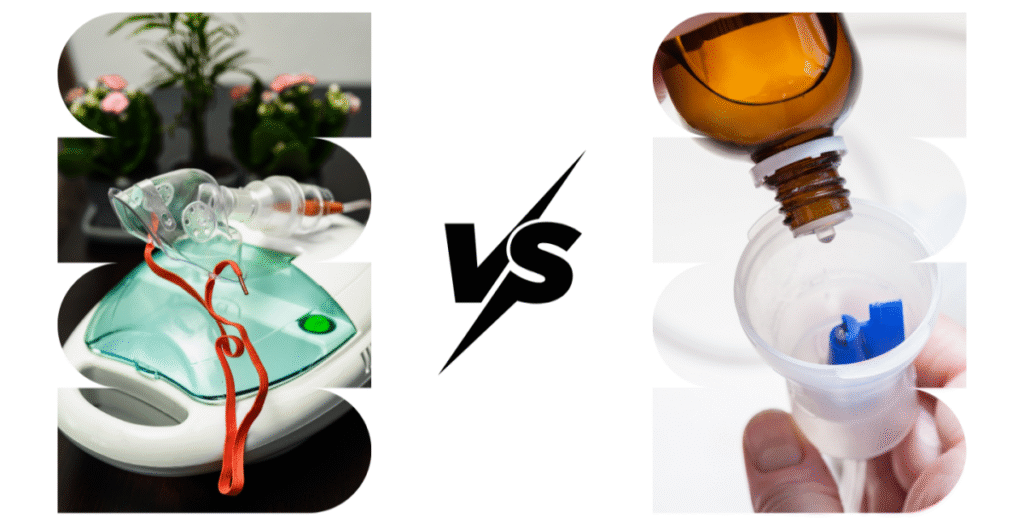
Many people use the words cleaning and sterilizing interchangeably, but in the context of medical devices like nebulizers, they refer to two different stages of hygiene. Understanding this distinction ensures that you are not just keeping the nebulizer looking clean but also making it safe for use.
Cleaning is the first step. It involves removing visible dirt, medication residue, and debris from the nebulizer parts using mild soap and warm water. This process helps eliminate surface particles and prepares the device for deeper disinfection. However, cleaning alone does not kill germs or bacteria that could cause infections.
Sterilizing, on the other hand, is the process of completely eliminating or destroying all microorganisms, including bacteria, fungi, and viruses. It usually involves using heat, steam, or a disinfectant solution designed to reach areas that simple washing cannot. Sterilization ensures the nebulizer parts are safe for direct contact with your respiratory system.
Cleaning represents maintenance and preparation, while sterilizing completes the cycle of protection. Both steps are essential; cleaning prevents buildup, and sterilizing prevents infection.
In practical terms, think of it as a two-step safety process. You clean to remove what you can see and sterilize to eliminate what you cannot. When performed together and regularly, they form a reliable routine that safeguards your health and keeps your nebulizer performing at its best.
You may also read: Biological Indicators for Sterilization
Step-by-Step Guide: How to Sterilize Nebulizer Parts
Sterilizing your nebulizer parts at home is simple when you follow the right steps. Proper sterilization ensures your device remains safe and effective for each treatment.
Step 1 – Disassemble the Nebulizer
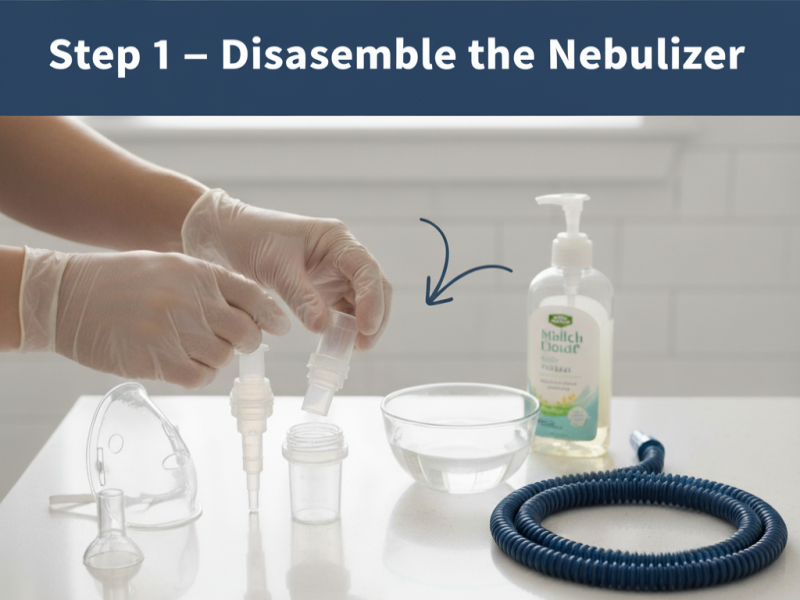
Carefully separate the mouthpiece or mask, medication cup, and tubing. Avoid damaging any parts while removing them. Remember, tubing should not be submerged in water.
Step 2 – Wash Nebulizer Parts with Warm, Soapy Water
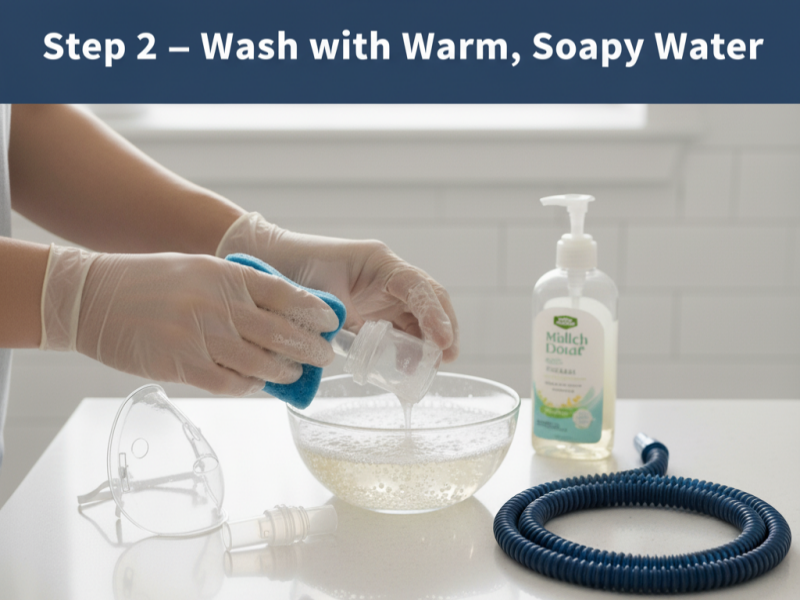
Use mild dish soap and warm water to wash the mouthpiece, mask, and medication cup. Gently scrub all surfaces to remove medication residue and debris.
Step 3 – Rinse Nebulizer Parts Thoroughly
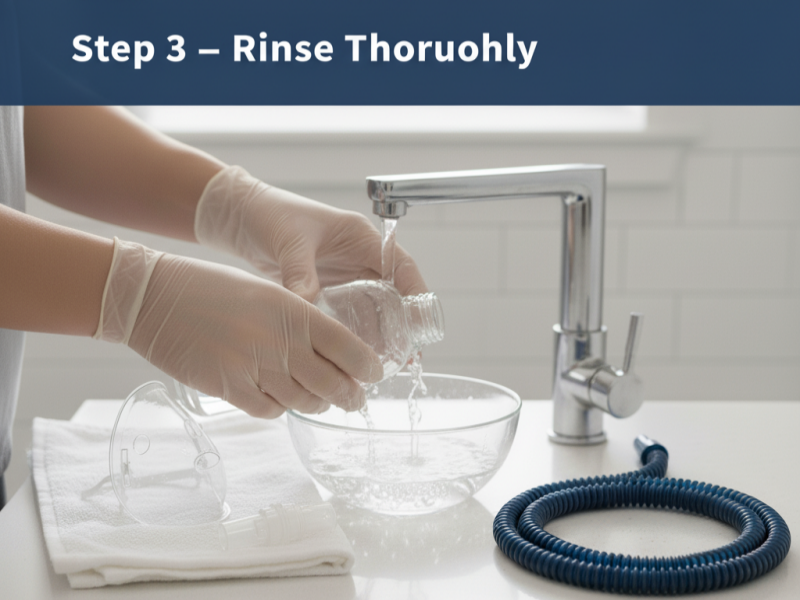
Rinse each washed part with distilled or sterile water to remove soap and residue. This prevents any leftover chemicals from being inhaled during your next treatment.
Step 4 – Choose a Nebulizer Parts Sterilization Method
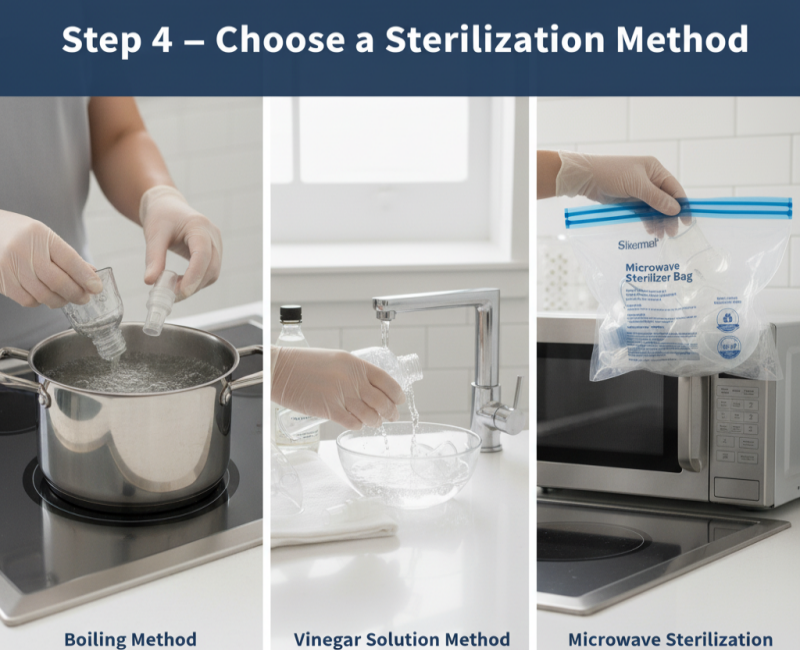
- Boiling Method: Place parts (except tubing) in boiling water for 5–10 minutes.
- Vinegar Solution Method: Soak parts in a solution of one part white vinegar to three parts water for 30 minutes, then rinse.
- Microwave Sterilization: Only use microwave-safe parts and follow manufacturer guidelines carefully.
Step 5 – Air Dry Nebulizer Parts Completely
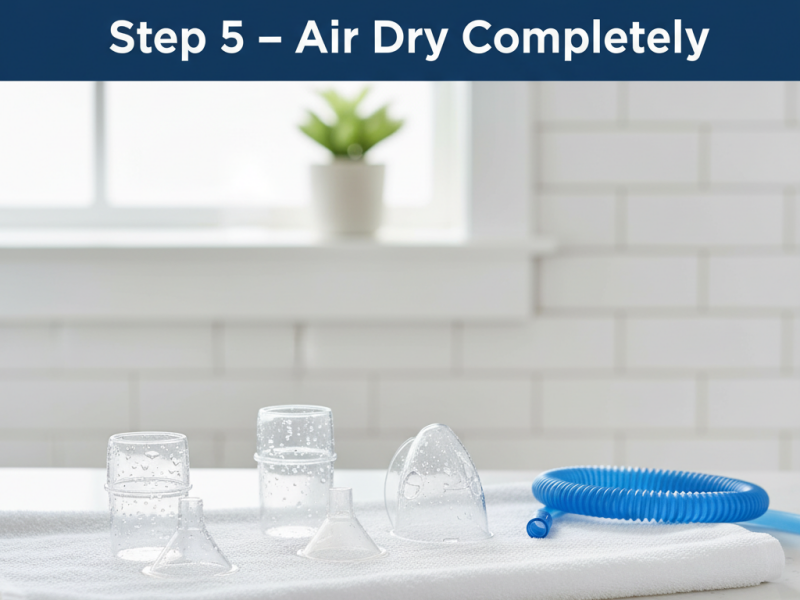
Place all sterilized parts on a clean, dry towel or paper towel. Allow them to air dry completely before reassembling.
Step 6 – Store Nebulizer Parts Properly
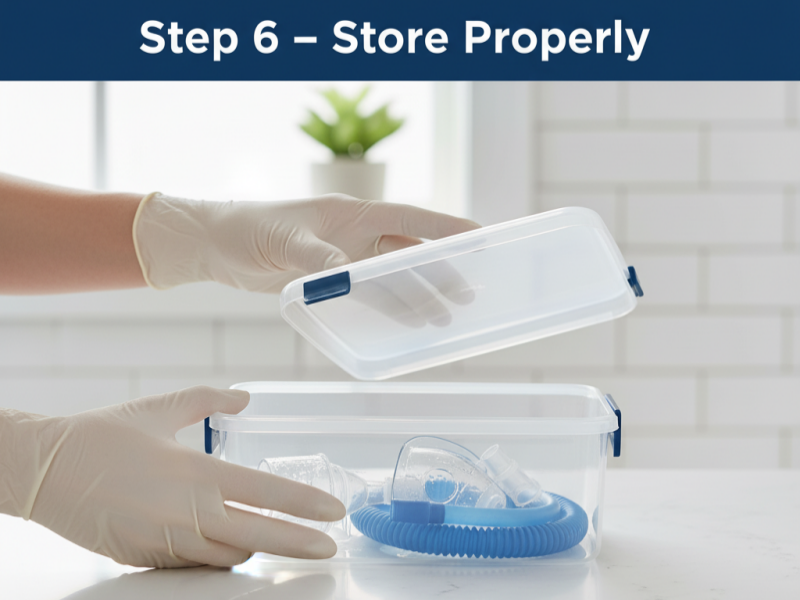
Once dry, store your nebulizer parts in a clean, dust-free container or area until the next use.
Following these steps consistently ensures your nebulizer remains hygienic and safe for every treatment.
Recommended Methods for Sterilizing Nebulizer Parts
Proper sterilization can be achieved using several methods. Each method has its benefits and limitations, so it’s important to choose the one that best suits your needs and the manufacturer’s instructions.
1. Boiling Method for Sterilizing Nebulizer Parts
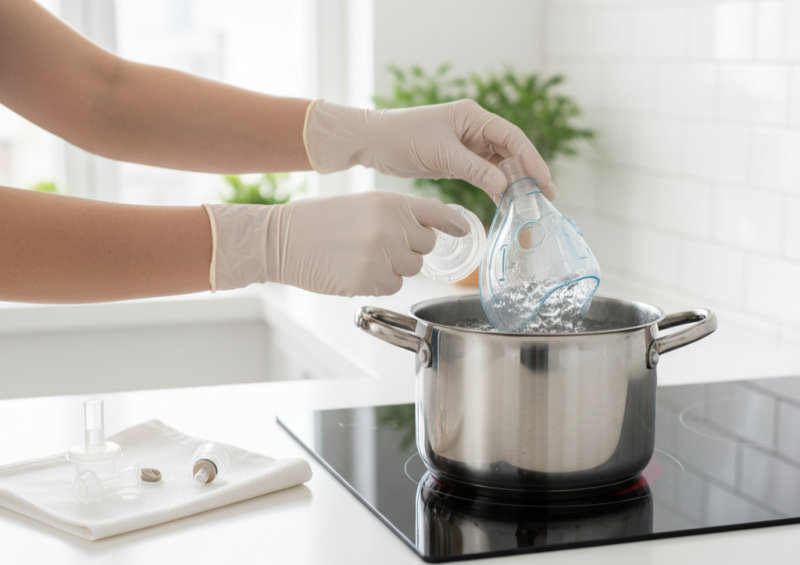
How it works: Submerge the nebulizer parts (excluding tubing) in boiling water for 5–10 minutes.
Pros:
- Kills most bacteria and viruses
- Simple and inexpensive
Cons:
- Not suitable for heat-sensitive parts
- Risk of warping or damage if left too long
2. Chemical Disinfectant Method for Sterilizing Nebulizer Parts
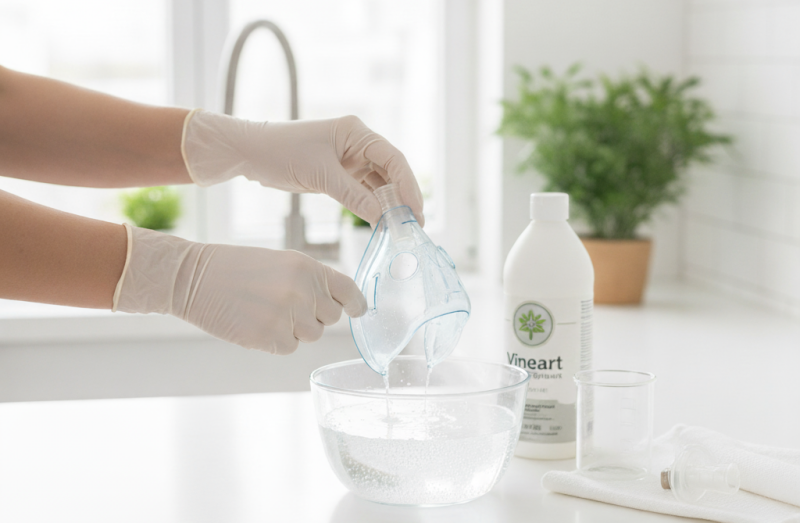
How it works: Soak parts in a solution such as 1 part white vinegar to 3 parts water, or use a manufacturer-approved disinfectant. Rinse thoroughly afterward.
Pros:
- Effective against bacteria, mold, and viruses
- Gentle on plastic parts
Cons:
- Strong chemicals may leave residue if not rinsed properly
- Some solutions may be harmful if inhaled
3. Steam Sterilizer Method for Sterilizing Nebulizer Parts
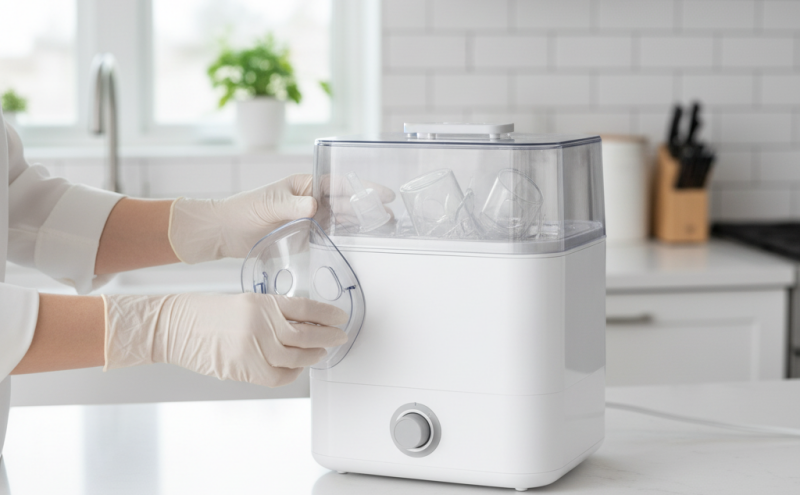
How it works: Use an electric steam sterilizer designed for medical devices or baby bottles. Place parts inside and follow the device instructions.
Pros:
- Fast and highly effective
- Reduces risk of damage to plastic parts
Cons:
- Requires specialized equipment
- Not all nebulizer parts are compatible
4. Microwave-Safe Bag Method for Sterilizing Nebulizer Parts
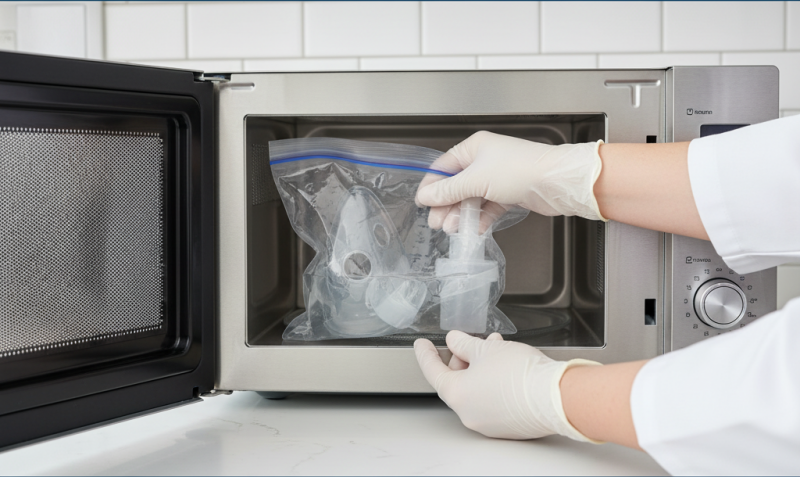
How it works: Place compatible nebulizer parts in a microwave-safe sterilization bag with water and heat according to manufacturer instructions.
Pros:
- Convenient and quick
- Effective for killing germs
Cons:
- Only works with microwave-safe parts
- Requires careful monitoring to avoid melting or damage
Choosing the right sterilization method depends on your nebulizer’s material, manufacturer recommendations, and how frequently you need to sterilize. Combining proper cleaning with these methods ensures safe and effective treatments.
How Often Should You Sterilize Nebulizer Parts
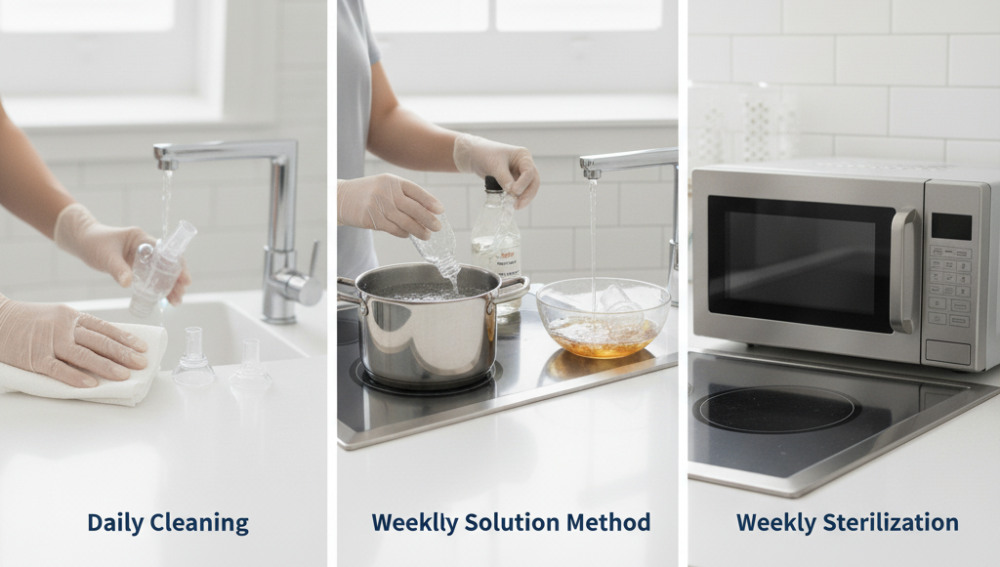
Maintaining a regular sterilization schedule is key to keeping your nebulizer safe and effective. While daily cleaning removes visible residue and prevents buildup, sterilization goes deeper to kill harmful bacteria and viruses.
- Daily: Clean the mouthpiece or mask, medication cup, and any parts that come into direct contact with medication after each use.
- Weekly: Sterilize the mouthpiece or mask and medication cup using boiling water, a vinegar solution, or another safe sterilization method.
- Special Cases: If you or someone using the nebulizer has a weakened immune system, respiratory infection, or chronic lung condition, consider sterilizing more frequently to reduce the risk of infection.
Following this routine ensures that every treatment is safe, hygienic, and effective, protecting both your lungs and the longevity of your nebulizer.
Common Mistakes to Avoid During Sterilization
Even with the best intentions, certain mistakes can reduce the effectiveness of nebulizer sterilization or damage your device. Avoid these common errors to keep your treatments safe and your nebulizer functioning properly:
- Submerging the Tubing: Tubing is not designed to be washed or sterilized. Water can get trapped inside, leading to bacterial growth.
- Using Harsh Chemicals: Bleach or strong disinfectants can damage plastic parts and leave harmful residues.
- Drying with Towels: Rubbing parts with towels can introduce lint or bacteria. Always air dry on a clean surface.
- Skipping Distilled Water Rinse: Tap water may contain minerals or bacteria that compromise hygiene. Always rinse with distilled or sterile water.
- Ignoring Manufacturer Guidelines: Each nebulizer model may have specific instructions for cleaning and sterilization. Ignoring them can void warranties or damage parts.
Being mindful of these mistakes ensures your nebulizer remains hygienic, safe, and fully functional.
Tips for Maintaining a Hygienic Nebulizer
Keeping your nebulizer clean goes beyond regular sterilization. Incorporating simple habits into your routine can prevent contamination and ensure your treatments remain safe and effective.
- Use Distilled Water Only: Always rinse parts with distilled or sterile water to avoid mineral buildup and bacterial growth.
- Replace Parts Regularly: Follow the manufacturer’s recommended replacement schedule for masks, mouthpieces, and medication cups.
- Keep the Compressor Dust-Free: Wipe the exterior of the compressor regularly and store it in a clean, dry area.
- Inspect Parts for Wear: Check for cracks, discoloration, or cloudiness, which can harbor bacteria and reduce effectiveness.
- Store in a Clean Container: After drying, keep nebulizer parts in a sealed, dust-free container to prevent contamination between uses.
Following these tips ensures that your nebulizer remains hygienic, reliable, and safe for every treatment.
When to Replace Nebulizer Parts
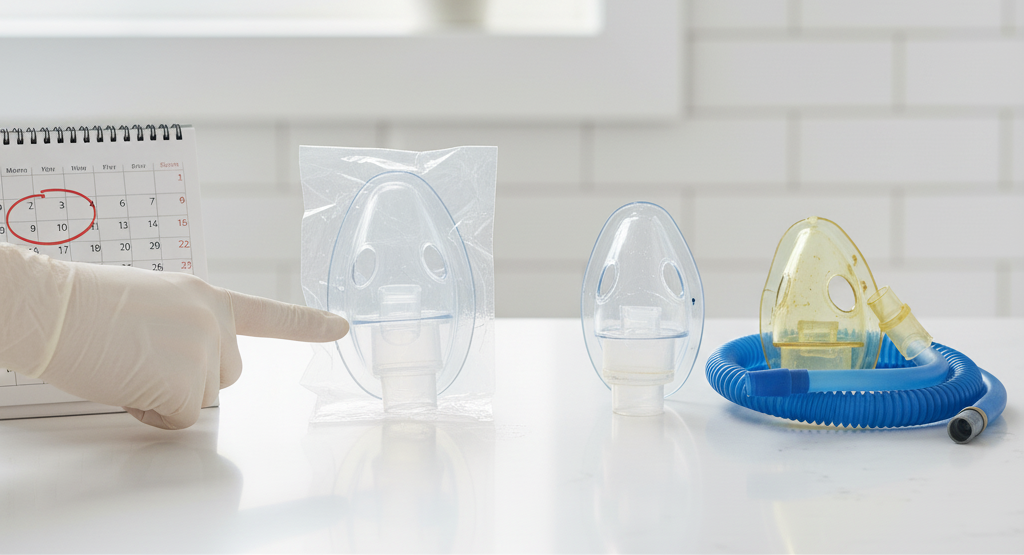
Even with proper cleaning and sterilization, nebulizer parts have a limited lifespan. Replacing them on time ensures optimal performance and reduces the risk of infection.
- Mask or Mouthpiece: Replace every 6 months, or sooner if it becomes cracked, discolored, or sticky.
- Medication Cup: Replace every 3 months, or immediately if you notice residue buildup that cannot be removed.
- Tubing: Replace every 6 months or sooner if it shows cloudiness, cracks, or moisture buildup.
- Filters (if applicable): Check and replace according to the manufacturer’s instructions, usually every 6–12 months.
Regular replacement combined with proper cleaning and sterilization ensures that your nebulizer delivers medication effectively and remains safe for every use.
Make Sterilization a Habit for Safer Breathing
Regular cleaning and sterilization of nebulizer parts is essential for maintaining respiratory health and ensuring effective treatment. By following proper procedures, avoiding common mistakes, and replacing worn parts on time, you can prevent infections and keep your device working efficiently. Making sterilization a consistent habit protects your lungs, extends the life of your nebulizer, and gives you peace of mind with every treatment. Safe and hygienic nebulizer use starts with simple, regular care.
FAQs: Sterilizing Nebulizer Parts
Yes, a diluted hydrogen peroxide solution can be used, but it must be thoroughly rinsed with distilled water afterward to avoid inhaling any residue.
White vinegar is a safe and effective option for disinfecting most plastic parts. Always rinse thoroughly after soaking to remove any acidic residue.
Tubing should never be submerged in water or sterilized. Wipe the exterior with a clean, dry cloth and replace it according to the manufacturer’s schedule.
Failure to sterilize can lead to bacterial or mold growth, increasing the risk of respiratory infections and reducing the effectiveness of medication delivery.
Only parts labeled as microwave-safe can be sterilized this way. Follow the manufacturer’s instructions carefully to avoid melting or damaging the components.